In today’s interconnected world, staying online while traveling is essential. However, managing physical SIM cards across different countries can be a hassle. Travelers often face long queues, language barriers, and compatibility issues. This traditional approach to mobile data can disrupt your journey before it even begins. Fortunately, there’s a revolutionary solution: the eSIM. This embedded SIM technology simplifies global connectivity, especially for iPhone users. Understanding how to leverage eSIM on iPhone can transform your travel experience, making it smoother and more efficient than ever before.
Understanding the Power of eSIM on iPhone
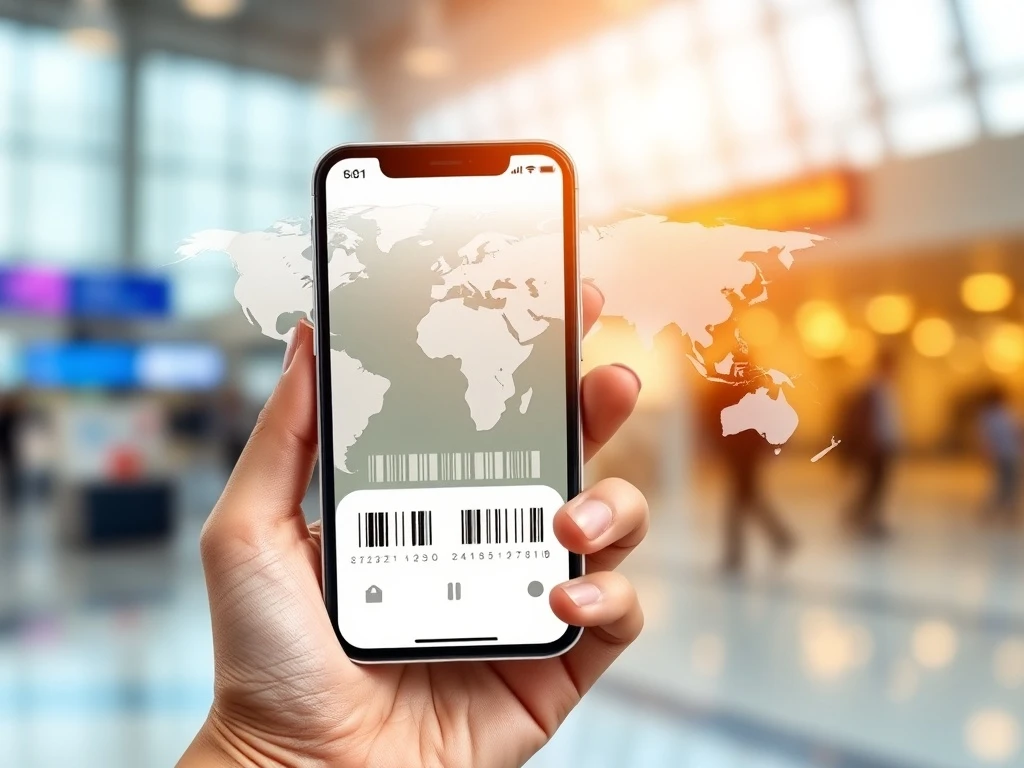
An eSIM, or embedded Subscriber Identity Module, is a digital SIM that allows you to activate a cellular plan from a carrier without needing a physical nano-SIM card. This innovative technology is built directly into your device, offering unparalleled convenience. For iPhone users, specifically those with iPhone XS, XR, or newer models, the eSIM capability unlocks a new era of connectivity. You can store multiple eSIM profiles on a single device, easily switching between them as needed. This feature is incredibly beneficial for international travel, providing instant access to local networks without the need for swapping cards.
Why should you consider an eSIM on iPhone? Firstly, it eliminates the stress of finding local SIM card vendors upon arrival in a new country. Secondly, it allows you to maintain your primary physical SIM for calls and messages while using the eSIM for data, ensuring you remain reachable on your main number. Furthermore, eSIMs often offer more flexible data plans, including pay-as-you-go options, which can be more cost-effective than international roaming charges from your home carrier. This digital convenience makes travel smarter and more enjoyable for everyone.
Introducing eSIM io: Your Global Connectivity Solution
eSIM io stands out as a premier provider for global internet access, offering seamless connectivity in over 180 countries. Their service is designed specifically for travelers, ensuring you can connect quickly and efficiently wherever your adventures take you. With eSIM io, the traditional hassles of international travel, such as searching for local SIM card shops or dealing with language barriers, become a thing of the past. Simply open the eSIM io app on your compatible iPhone, and you can gain instant internet access.
eSIM io offers flexible options tailored to different travel needs. First, their Pay-As-You-Go model provides ultimate flexibility. You top up your balance within the app and are only charged for the mobile data you actually consume. This option connects you directly to local mobile networks, ensuring reliable service. Second, their Data Plans allow you to purchase a fixed package for a selected country or region, lasting from 30 to 360 days. These plans come with no hidden charges, making them perfect for travelers needing a predictable internet package. Best of all, eSIM io introduces the groundbreaking OneSIM feature. This innovation allows you to use just one eSIM for all your trips, eliminating the need to repeatedly remove and install new profiles. This truly simplifies global connectivity for your eSIM on iPhone.
Essential Prerequisites for Installing eSIM on iPhone
Before you begin the installation process, ensure your iPhone meets the necessary requirements. These steps guarantee a smooth and successful activation of your eSIM. Firstly, confirm your iPhone model. eSIM on iPhone functionality is available on iPhone XS, iPhone XR, and all newer models (including iPhone 11, 12, 13, 14, and 15 series). Older iPhone models do not support eSIM technology. Secondly, verify that your iPhone is connected to a stable Wi-Fi network. A strong internet connection is crucial for downloading the eSIM profile. Without it, the activation process might fail or be significantly delayed.
Furthermore, it is advisable to ensure your iPhone’s operating system is up to date. While not always strictly required, having the latest iOS version often resolves potential compatibility issues and improves overall performance. Finally, be aware of your iPhone’s carrier lock status. If your iPhone is locked to a specific carrier, it might prevent the activation of an eSIM from a different provider. Unlocking your device before attempting to install an eSIM from a third-party service like eSIM io is highly recommended. Addressing these prerequisites ensures a seamless experience when you install your eSIM on iPhone.
Step-by-Step Guide: How to Install eSIM on iPhone
Installing your eSIM on an iPhone is a straightforward process, offering two primary methods: via QR code or manual setup. Choose the method that best suits your current situation. Both approaches are designed for user convenience, allowing you to quickly get connected. Follow these instructions carefully to activate your new cellular plan.
Method 1: Installing eSIM on iPhone Using a QR Code
This is often the quickest and most common way to activate your eSIM. You will need access to the QR code, typically provided in an email from eSIM io, displayed on an alternate device or printed out. This method streamlines the setup, making it very user-friendly.
Prerequisites for QR Code Installation:
- A secondary device (another phone, tablet, or computer) to display the QR code.
- A stable Wi-Fi connection on your iPhone.
- The QR code email from eSIM io.
Instructions for QR Code Installation:
- Access the QR code email from eSIM io on your secondary device. Ensure the QR code is clearly visible.
- On your iPhone, navigate to: Settings > Mobile Data > Add Data Plan.
- Your iPhone camera will activate. Position your iPhone to scan the QR code displayed on your secondary device. Hold it steady until the scan is complete.
- When the “Add Cellular Plan” prompt appears, select Continue. This confirms you wish to add the new data plan.
- Once prompted, select Done. Your eSIM profile is now installed on your device.
Should the QR code not scan immediately, ensure good lighting and a steady hand. Sometimes, restarting the iPhone or re-accessing the “Add Data Plan” section can resolve minor glitches. This method significantly simplifies the process of getting your eSIM on iPhone ready for use.
Method 2: Manual Setup for eSIM on iPhone Without a QR Code
If you cannot access a QR code scanner or a secondary device, the manual setup option is your alternative. This method requires you to input specific details provided by eSIM io directly into your iPhone settings. While slightly more involved, it offers flexibility when a QR code isn’t feasible.
Instructions for Manual Setup:
- On your iPhone, navigate to: Settings > Mobile Data > Add Data Plan.
- At the bottom of the screen, select Enter Details Manually.
- You will need to insert the information given to you by eSIM io. This typically includes the SM-DP+ Address, Activation Code, and sometimes a Confirmation Code. You can find these details within your eSIM io app or the original eSIM activation email.
- Tap Next after entering the required information.
- Then, select Add Data Plan to confirm the addition of the new cellular plan.
- Complete the process by selecting Done.
Always double-check the entered information for accuracy during manual setup. Even a small typo can prevent the eSIM from activating correctly. If you encounter issues, verify the details against your eSIM io account or contact their support. Successfully setting up your eSIM on iPhone manually ensures you are prepared for global connectivity, even without a QR code.
Post-Installation Configuration: Optimizing Your eSIM Experience
After successfully installing your eSIM, there are a few crucial steps to configure it properly. These settings ensure your new eSIM works seamlessly alongside your existing physical SIM, if applicable, and provides optimal performance, especially when traveling. Taking these steps ensures you fully leverage the capabilities of your eSIM on iPhone.
- Label Your Plan: It is highly recommended to label your new eSIM plan for easy identification. Go to Settings > Mobile Data, tap on the newly added plan (it might be labeled “Secondary” or “Travel”), and change its label to something clear, such as “eSIM io Travel” or “eSIM Data.” This clarity helps you manage your connections effectively.
- Set Default Line: Decide which line will be your primary for calls and messages. Go to Settings > Mobile Data > Default Voice Line. You will likely want to keep your primary physical SIM number for calls and messages. However, for data, you will select your eSIM.
- iMessage & FaceTime: Ensure these services are linked to your preferred number. Navigate to Settings > Messages > Send & Receive and Settings > FaceTime. Select your primary number to ensure continuity with your contacts. This prevents confusion for those trying to reach you.
- Mobile Data Selection: This is a critical step for internet access. Go to Settings > Mobile Data > Mobile Data. From the options, choose “eSIM io” (or whatever you labeled your eSIM) as your default line for mobile data. This ensures your iPhone uses the eSIM for internet connectivity.
- Turn On Data Roaming (When Traveling): While at home, keep data roaming off on your eSIM. However, as soon as you arrive at your travel destination, go to Settings > Mobile Data, tap on your eSIM io plan, and turn Data Roaming ON. This allows your eSIM to connect to local networks and provide internet access. Remember to turn it off when you return home to avoid unexpected charges on other plans. Properly managing these settings ensures your eSIM on iPhone functions as intended during your travels.
Activating Your eSIM While Traveling: A Quick Checklist
Once you arrive at your destination, activating your eSIM for data use is a simple process. Follow these steps to ensure you get online quickly and without complications. These actions are essential for your eSIM on iPhone to connect to local networks and provide internet access.
- Arrive at Your Destination: Your eSIM will only activate once it detects a network in the country for which it was purchased or where it has coverage.
- Access Mobile Data Settings: On your iPhone, go to Settings > Mobile Data.
- Enable Your eSIM Plan: Ensure your eSIM io plan is turned on. You should see a toggle switch next to its label. If it’s off, toggle it on.
- Enable Data Roaming: Tap on your eSIM io plan. Scroll down and make sure Data Roaming is toggled ON. This is crucial for connecting to the local partner networks. Without data roaming enabled, your eSIM will not provide internet service outside your home region.
- Check for Signal Bars: Once activated, you should see signal bars appear at the top of your screen next to your eSIM’s label. This indicates a successful connection to the local network.
If you don’t see signal bars immediately, try restarting your iPhone. Sometimes, a quick reboot helps the device recognize the new network. Confirming these settings ensures your eSIM on iPhone is fully operational for your travel needs.
Troubleshooting Common eSIM on iPhone Issues
While eSIM technology is generally reliable, you might encounter minor issues. Understanding how to troubleshoot common problems can save you time and frustration. Most issues related to your eSIM on iPhone can be resolved with a few simple checks.
- “No Service” or “Searching”: If your iPhone shows no service, first verify that you have enabled Data Roaming for your eSIM plan in Settings > Mobile Data > [Your eSIM Plan]. Also, ensure you are within the covered country or region. Sometimes, simply restarting your iPhone can resolve temporary network glitches. If the issue persists, try manually selecting a network operator from your iPhone’s cellular settings (Settings > Mobile Data > [Your eSIM Plan] > Network Selection > Automatic off, then choose a network).
- Data Not Working: If you have a signal but no internet access, check if your eSIM plan is selected for Mobile Data (Settings > Mobile Data > Mobile Data). Confirm that you have sufficient data balance or an active data plan with eSIM io. Also, ensure your APN settings are correct, though eSIM io usually configures these automatically. If needed, you can find the correct APN in your eSIM io app or support documentation.
- eSIM Not Activating: Double-check the QR code scan or manual entry details. A small error in the SM-DP+ Address or Activation Code can prevent activation. Ensure your iPhone is connected to Wi-Fi during the initial setup process. If activation repeatedly fails, your iPhone might be carrier-locked, preventing third-party eSIMs. Contact your original carrier to confirm if your device is unlocked.
- Switching Between SIMs: If you’re having trouble switching between your physical SIM and eSIM, navigate to Settings > Mobile Data. Here, you can tap on “Default Voice Line” or “Mobile Data” to choose the line you wish to use. Ensure the line you intend to use is toggled “On.”
If these troubleshooting steps do not resolve your issue, the eSIM io support team is available 24/7. They can provide personalized assistance for any challenges you face with your eSIM on iPhone.
The Unmatched Power of OneSIM: Travel Without Limits
eSIM io’s OneSIM feature truly elevates the travel experience, offering an unparalleled level of convenience for global adventurers. This innovative solution means you no longer need to install a new eSIM profile for every single country you visit. Traditionally, travelers would purchase a new local SIM or eSIM for each destination, leading to multiple activations and management headaches. With OneSIM, this complexity is entirely removed, simplifying your journey immensely. It’s a game-changer for frequent international travelers.
How does OneSIM work with your eSIM on iPhone? Once you have the OneSIM profile installed, it becomes your universal travel companion. You simply top up your balance within the eSIM io app, and as you travel to any of the 180+ supported countries, your existing eSIM will automatically connect to the local partner networks. There’s no need for further configuration, no new QR codes to scan, and no additional profiles to manage. This feature streamlines connectivity, allowing you to focus on enjoying your trip rather than worrying about your internet access. It truly embodies the “Travel Smarter, Connect Faster” motto.
Why eSIM io is the Smart Choice for Global Travelers
Choosing eSIM io for your global connectivity needs offers a multitude of benefits that enhance your travel experience. First and foremost, the sheer convenience is unmatched. You can purchase and activate your data plan from anywhere, even before you leave home, ensuring you land with immediate internet access. This eliminates the frantic search for local SIM cards upon arrival, saving valuable time and reducing stress.
Furthermore, eSIM io provides transparent and flexible pricing. Whether you prefer the pay-as-you-go model for light usage or fixed data plans for predictable costs, you have options that suit your budget. There are no hidden charges, which builds trust and financial clarity. The extensive global coverage, spanning over 180 countries, means you can rely on eSIM io for almost any destination. Finally, the dedicated 24/7 support team ensures assistance is always available, making your journey with eSIM on iPhone as smooth as possible. Embrace the future of travel connectivity with eSIM io.
Start Your Journey with eSIM io!
Embracing eSIM technology on your iPhone marks a significant upgrade to your travel experience. It offers unparalleled convenience, flexibility, and global reach, freeing you from the limitations of physical SIM cards. With eSIM io, you gain a reliable partner for staying connected across continents. Download the eSIM io app today and get connected in minutes, anywhere in the world. Say farewell to the old ways of mobile data and embrace smarter, faster, and more seamless travel with your eSIM on iPhone.
Frequently Asked Questions (FAQs) about eSIM on iPhone
Q1: What iPhone models support eSIM?
A1: eSIM functionality is available on iPhone XS, iPhone XR, and all newer models, including the iPhone 11, 12, 13, 14, and 15 series. Ensure your iPhone is updated to the latest iOS version for optimal compatibility.
Q2: Can I use both a physical SIM and an eSIM simultaneously on my iPhone?
A2: Yes, iPhones with eSIM capability support Dual SIM functionality. This allows you to use one physical nano-SIM and one eSIM at the same time. You can assign one for calls/messages and the other for mobile data, or switch between them as needed.
Q3: Is my iPhone required to be unlocked to use an eSIM from eSIM io?
A3: Yes, your iPhone generally needs to be unlocked by your original carrier to use an eSIM from a different provider like eSIM io. A carrier-locked phone might restrict you to only using SIMs from that specific carrier.
Q4: What should I do if my eSIM on iPhone is not connecting after activation?
A4: First, ensure Data Roaming is ON for your eSIM plan in Settings > Mobile Data. Check if you are in a covered country and have sufficient data balance. Try restarting your iPhone. If issues persist, contact eSIM io’s 24/7 support team for assistance.
Q5: How does eSIM io’s OneSIM feature work for multiple countries?
A5: With OneSIM, you install a single eSIM profile. When you travel to any of the 180+ supported countries, your existing OneSIM profile automatically connects to local networks without needing new installations or QR codes. You simply top up your balance as required.